,On,The,Branch,Of")
Introducing beneficial insects into your garden is more than just sprinkling a few on your plants and hoping for a miracle. It’s a genuine crop defense strategy.
To transform your garden into a resilient ecosystem, technical precision is your best ally. At Horpi, we advocate an approach based on observation and respect for living things. Here’s the complete protocol to guarantee the efficiency of your ladybugs.
1. Understanding your allies : Larvae vs Adults
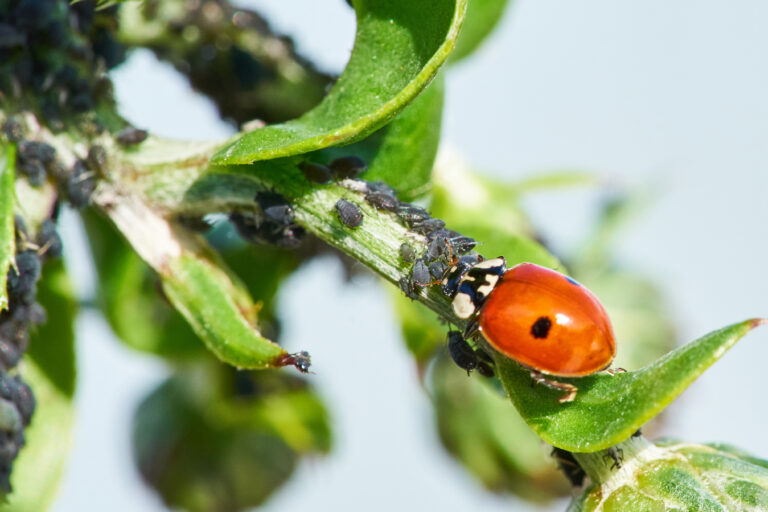
TheAdalia bipunctata (two-spotted ladybug) is a formidable predator, but its mode of action changes according to its stage of development.
- La Larve: the intensive cleaning unit. Unable to fly, it is condemned to eat or perish. Its voracity is legendary: it can devour up to 100 aphids a day. Unlike the adult, it has no instinct to disperse. It remains “glued” to the colony until it is completely eliminated.
- The Adult: the mobile guardian. More versatile, the adult can roam your garden to flush out isolated colonies. Their role is twofold: they consume the pests and, above all, they ensure the durability of the treatment by laying eggs. A single female can lay hundreds of eggs, ensuring protection for several generations.
Discover our Adalia bipunctata ladybugs at different stages of development: larvae and adults.
2. Dosage guide: how many ladybugs should I plan to use?
One of the secrets of success lies in the population density introduced. Here are our recommendations for your type of crop:
- Roses or low plants: expect 20 to 50 larvae per plant. Release them in priority on terminal buds and the underside of young leaves, where sap attracts aphids.
- Shrubs and fruit trees (under 2m): A dosage of 50 to 100 larvae is required. The use of a cotton bag suspended in the heart of the foliage is the most effective solution here.
- Large trees or dense hedges: Count 100 to 250 individuals. In this case, we recommend a combination of larvae for visible foci and adults to cover the entire canopy.
3. Timing: don’t waste your resources
The fatal mistake is to anticipate the attack. If you release larvae when no aphids are present, they will starve to death within a few hours. Unlike adults, who can fly to other areas, larvae are captive to the plant where they are deposited: without immediate prey, they will perish irretrievably.
The weather window: Ladybirds are ectothermic insects (their activity depends on the heat outside).
- Ideal conditions: Temperature between 15°C and 25°C, in dry, calm weather.
- The sky: Overcast days are ideal. The absence of direct sunlight prevents desiccation and heat stress.
- Time of day: prefer an evening release. This allows the insects to anchor themselves to the foliage and rehydrate overnight before the next day’s heat.
- Rain and wind: Postpone release if heavy rain is forecast, as it could drown the larvae or physically dislodge them.
4. Reception and storage: respecting 5°C
As soon as you receive your Horpi package, you’ll receive ready-to-use insects, along with a natural substrate and food for the journey. Our online resources are there to guide you step by step.
- Immediate release: for maximum vitality and efficiency.
- Temporary storage: If the weather is unfavorable, place the can in the refrigerator (crisper, between 5°C and 6°C).
Caution: Keeping larvae too long in their boxes weakens them. This emergency storage should never exceed 72 hours (3 days). Beyond that, depletion of their reserves compromises their survival.
5. The art of letting go: Horpi methodology
Cotton bag (50, 100 or 250 larvae)
It’s the ideal “zero stress” solution for trees. Hang the bag directly from an infested branch. The cotton acts as a natural shelter from UV rays and wind, allowing the larvae to emerge at their own pace to feeding areas.
The precision box
It allows surgical distribution on the most affected areas (low plants, roses).
Mistake to avoid: Releasing all the larvae in the same place. Pro tip: Use a small brush to delicately deposit the larvae, one by one or in small groups, on all infestation points. Spread them over the whole plant to optimize coverage and avoid competition between beneficials.
6. Securing your investment: the war of the ants
This is the number one failure factor. Ants “milk” aphids for their honeydew and fiercely protect them like cattle. They won’t hesitate to attack or even dismember your ladybug larvae to defend their resource.
Corrective action: Before release, install a physical barrier (glue tape) on the trunk or diatomaceous earth at the base of the stems. Without this barrier, the effectiveness of your biological control can drop by 80%.
7. After treatment: sedentarizing your helpers
Once the cleaning is done, maintain a welcoming environment to encourage adults to stay in your home:
- Relay plants: Preserve biodiversity zones with melliferous flowers (nasturtiums, marigolds, fennel) that offer pollen and nectar.
- Zero chemicals: Even so-called “organic” treatments (black soap, neem oil) are fatal for larvae. Stop spraying 15 days before and after introduction.
- Overwintering habitat: A small pile of dead wood or an insect hotel will enable adults to overwinter in your home.
8. Follow-up: don’t confuse death with metamorphosis
After 10 to 15 days of intense activity, your larvae settle down and attach themselves firmly to a leaf: this is pupation. They take on the appearance of small, immobile shells. Don’t touch them! Under this envelope, the metamorphosis takes place. It’s the ultimate sign of your installation’s success.
Conclusion: Towards an autonomous garden
Releasing ladybugs is an important step towards the health of your garden. By adhering to this rigorous technical protocol – evening timing, storage at 5°C and ant-proofing – you restore a lasting natural balance without resorting to chemicals.
Need to know more about your strategy?
Consult our complete technical resources or select the appropriate format on our auxiliary solutions page.